
Step 1: Obtain Google OAuth API keys
1. Create or select a Google Cloud project:
- Go to: https://console.developers.google.com/cloud-resource-manager
- Click on CREATE PROJECT. Give your project a name and select your organization/location (if applicable).
- Do you already have a project for this connection? Then you can skip this step and directly select the existing project.


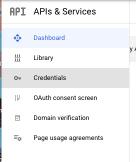
2. Open the API & Services settings:
- Once the project is created, click on View Project.
- You will now be on the project dashboard. Click on APIs & Services → OAuth consent screen.

3. Set up the OAuth Consent Screen:
- Choose Internal if only users within your organization have access, or External if external users also need access.
- Fill in the required fields.
- Save the settings.
4. Create OAuth 2.0 Client Credentials:
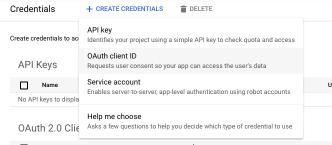
- Go to Credentials in the left menu. Click on + CREATE CREDENTIALS → OAuth client ID.
- Choose Application type: Web application.
- Give the client a recognizable name, for example FileFlow SSO.

5. Set Authorized Redirect URIs:
- Add the following URL under Authorized redirect URIs (this is needed to redirect the SSO back to FileFlow):
- Enter the Redirect-URI:
https://subdomain.fileflow.com/users/auth/google_oauth2/callback(replace subdomainwith your subdomain). - Click on Create to create the application.
6. Download or copy the information:
- After creating, you will see the following information:
- Client ID
- Client Secret
Step 2: Configure FileFlow for SSO
To complete the SSO integration in FileFlow, we need the following information from you:
- Client ID: The application ID you noted down.
- Client Secret: The generated client secret.
Send this information securely to us, so we can complete the configuration on our end.