Step 1: Obtain Microsoft OAuth API keys
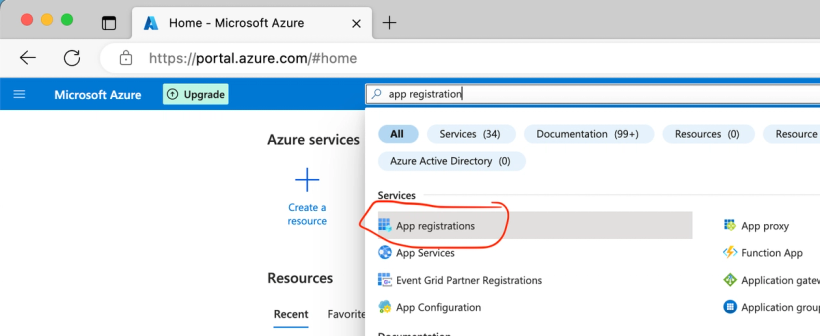
1. Navigate to 'App registrations':
- Open the Azure portal and go to Azure Active Directory.
- Select App registrations in the menu on the left.

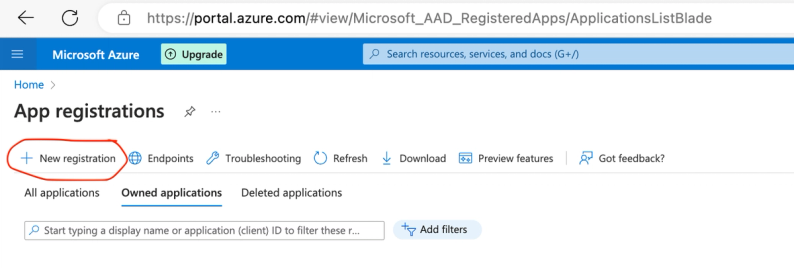
2. Register a new application:
- Click on New registration.
- Give your application a name, for example "FileFlow DAM".

- Under Supported account types, choose the option that best fits your organization. For B2B applications, it's often desirable to only allow accounts from your organization.
- Enter the Redirect URI:
https://subdomain.fileflow.com/users/auth/entra_id/callback(replacesubdomainwith your subdomain). - Click Register to create the application.


3. Obtain Client-ID, Client-secret, and Tenant-ID:
- After registration, you'll see the Client-ID (also called Application-ID). Note this for later use.
- After registration, you'll also see the Tenant-ID (also called Directory-ID). Note this as well for later use.


- To generate a Client-secret:
- Go to Certificates & secrets in the application menu.
- Click on New client secret and provide a description and expiration date.
- Click Add and note the value of the generated secret; this will not be visible later.


Step 2: Configure FileFlow for SSO
To complete the SSO integration in FileFlow, we need the following information from you:
- Client-ID: The application ID you noted.
- Client-secret: The generated client secret.
- Tenant-ID: The Tenant-ID you noted.
Send this information securely to us, so we can complete the configuration on our end.